fluentdをwindowsにインストールしたら、次にfluentdをwindowsにサービス登録し、自動でfluentdが起動するようにしておきましょう。
レジュメ
Windowsにfluentdをサービス登録する方法
fluentd –?
を実行すれば、fluentdのヘルプが見れてWindowsサービスに登録する方法がわかります。
fluentdをWindowsサービスに登録
以下のコマンドを実行します。
fluentd --reg-winsvc i
これでfluentdがWindowsサービスに登録されました。
fluentdのWindowsサービス情報を見てみましょう。
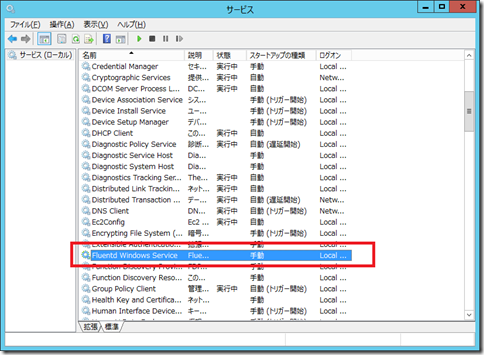
「services.msc」を実行し「Fluentd Windows Service」サービスがあることを確認します。
ただこのままでは、fluentd設定ファイル(fluent.conf)の情報等オプション情報が記載されていません。fluentdのオプション情報を記載しましょう
「Fluentd Windows Service」サービスにfluent.confとログ出力をオプション設定する
以下のコマンドを実行しましょう
fluentd --reg-winsvc-fluentdopt "-c c:\fluentd\fluent.conf -o c:\fluentd\fluent.log"
その後「Fluentd Windows Service」サービスを実行させ、オプション指定したパス(c:\fluentd\fluent.log)にログ出力がされていることを確認します。
net start "Fluentd Windows Service"
fluentdの設定ファイルもオプション指定したパス(c:\fluentd\fluent.conf )から読み込んでいることが確認できます。成功ですね!
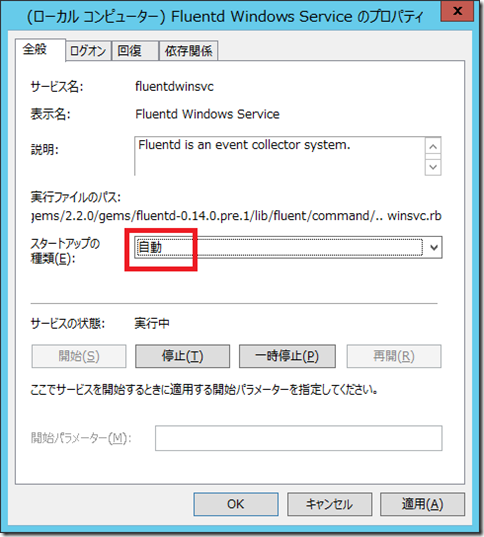
「Fluentd Windows Service」サービスもスタートアップの種類を「自動」にしOS起動時にfluentdを自動起動にしておきましょう


